Dull Knives: How to Tell, How to Sharpen, and Why the Dishwasher Is the Enemy
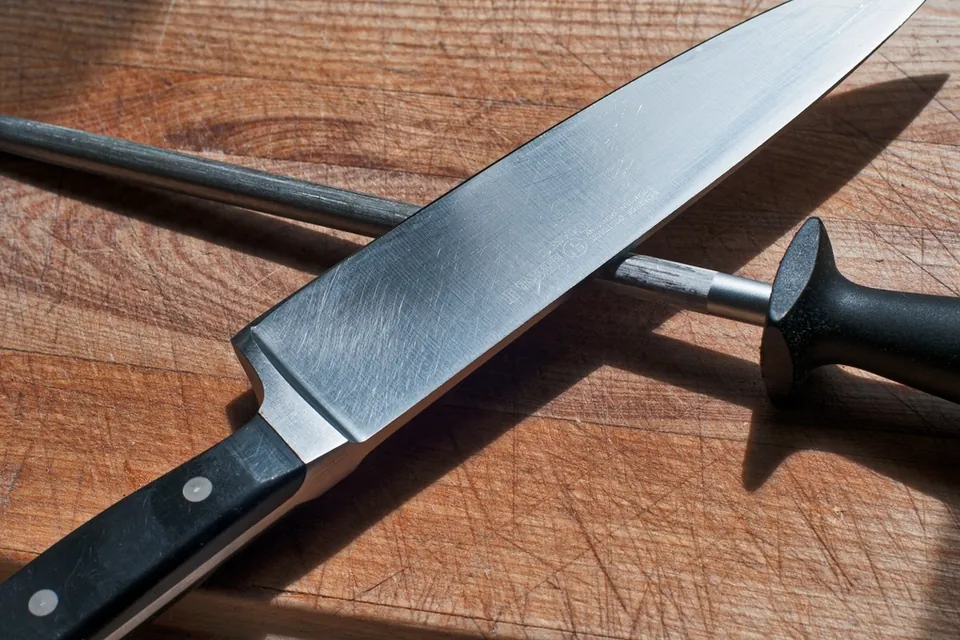
A dull knife is more dangerous than a sharp one: it needs more force, slips off tomato skins and onion layers, and lands where you did not intend. The good news is that keeping knives sharp is simple once you separate two jobs that are often confused, honing and sharpening, and choose a sharpening method that matches your knives and your patience.
How to tell a knife is dull
- Paper: hold a sheet of printer paper by a corner and slice down from heel to tip. A sharp knife cuts cleanly; a dull one tears or skids.
- Tomato: lay the edge on a ripe tomato and draw it back without pressure. A sharp edge bites immediately.
- Light: hold the knife edge-up under a bright light. A sharp edge is invisible; dull spots and dents reflect light as bright lines.
- Feel in use: if you push down hard, or onions crush and make you cry more than usual, it is time.
Honing versus sharpening
With use, the very thin edge of a knife bends and rolls to one side. Honing on a steel or ceramic rod pushes it back into line without removing much metal. A few light strokes per side before each use keep a knife cutting well for weeks. Eventually, the edge wears and rounds, and honing no longer helps. Sharpening grinds away metal on both sides until they meet again in a fresh, fine edge. Ridged steel rods suit softer Western knives; smooth or ceramic rods are gentler on harder Japanese steels.
Sharpening methods compared
| Method | Strengths | Limits |
|---|---|---|
| Whetstones (water or oil stones) | Finest edge, full control of angle and metal removed, suits any straight-edged knife | Learning curve; time; stones need flattening |
| Guided systems (clamp or rod guides) | Consistent angle; good results quickly | Setup time; some do not suit very small or large knives |
| Electric sharpeners with abrasive wheels | Fast, consistent angle | Remove metal quickly; can overheat or scratch; fixed angles may not suit Japanese knives |
| Pull-through (carbide or ceramic slots) | Cheap, quick, no skill needed | Carbide scrapes rather than grinds, leaving a coarse, ragged edge and removing more metal; can chip hard steels |
| Professional service | No equipment; restores damaged blades | Cost; quality varies; knives away for a time |
Spring-loaded or V-shaped pull-through sharpeners are widely sold with impressive claims. They are convenient for an inexpensive knife that would otherwise never be sharpened, but they are a poor match for thin, hard Japanese blades and for knives you want to last decades. Ceramic-slot models are gentler than carbide ones.
Whetstones step by step
- Choose grits. A medium stone (around #1000) does most of the work; a fine stone (#3000 to #6000) polishes. A coarse stone (#200 to #400) is only needed for chips or very dull knives.
- Prepare the stone. Soak water stones that need it until bubbles stop (some "splash-and-go" stones need only a wet surface). Set it on a damp towel or holder so it cannot slide.
- Find the angle. For about 15 degrees, the spine sits roughly two stacked coins above the stone on a typical chef's knife; for 20, a little higher. Angle guides that clip on the spine help beginners.
- Raise a burr. Push the blade across the stone, edge leading, from heel to tip, keeping the angle steady, until you can feel a slight rough lip (the burr) along the whole opposite side.
- Switch sides. Repeat on the other side until the burr flips back.
- Refine. Move to the fine stone with lighter strokes, alternating sides, then remove the last burr with a few edge-trailing strokes or on a leather strop or newspaper.
- Clean up. Rinse and dry the knife; rinse the stone and let it dry in air.
The marker trick
Colour the edge bevel on both sides with a permanent marker before sharpening. After a few strokes, look at where the ink has been removed. If only the shoulder is clean, your angle is too low; if only the very edge is clean, it is too high. Adjust until the stone removes ink across the whole bevel. It is the quickest way to learn angle control without guessing.
Serrated knives
Serrated bread knives stay useful for a long time because the points do the cutting and the gullets are protected. When they do dull, use a tapered ceramic rod that fits the scallops, sharpening each one on the bevelled side only, then remove the burr on the flat side with a light pass on a fine stone. Most pull-through sharpeners are not suitable; some electric models have a dedicated slot.
Why dishwashers dull knives
"Dishwasher-safe" usually means the handle and steel will not be destroyed by a dishwasher, not that the edge will survive unchanged. Knives rattle against racks and other items, which dents the edge; long exposure to heat, moisture and alkaline detergent promotes pitting and rust spots even on stainless steel; and wooden or composite handles can crack or loosen. Many makers advise hand washing regardless. Washing with warm soapy water, rinsing and drying straight away takes less than a minute.
Storage and boards
- Use wood or plastic cutting boards. Glass, stone, ceramic and steel boards dull knives within minutes.
- Store knives on a magnetic strip, in a block or with edge guards, not loose in a drawer.
- Do not scrape food across the board with the edge; flip the knife and use the spine.
Sharpening safely
- Work slowly, on a stable surface, with the edge pointing away from you on the return stroke.
- Keep fingers on the flat of the blade, behind the edge.
- Wipe the blade from spine to edge, never along the edge.
- A cut-resistant glove on the hand guiding the blade is a sensible precaution for beginners.
How often?
For a home cook using one main knife daily, honing before use and sharpening every one to three months is typical. Harder steels hold their edge longer between sharpenings; softer steels need honing more often. Let the paper test, not the calendar, decide.
Sources
- USDA Food Safety and Inspection Service, Cutting boards and food safety.
- ISO 8442-1, requirements for cutlery for the preparation of food, including corrosion resistance.
 Tools & appliances
Choosing a santoku
Shape, steel, hardness and edge angle, plus a paper, tomato and onion test you can do at home.
 Tools & appliances
Choosing a meat slicer
Blade size and type, gearing, guards and standards, and a cleaning routine that keeps Listeria away.
 The kitchen
Organising a kitchen
Work zones, a fridge set to 4 °C, pantry rotation and the date-label rules, step by step.